Oct. 27, 2012
Just a quick note- we have to do a research summary for our Personal Project but I know mine would just be a very long boring document of everything below! So what I'm planning on doing is counting all of the entries below as my summary. My preference for reading the summary is to go to the bottom and read up, to see all of the relevant information in the order that I found it in! Thanks :)
Also please note that I may add further research above, so the summary will include anything I post from now until the due date (Nov. 1st) above. As well, the video above is just another research tool I've discovered for this project. Not sure if you can actually view it on the blog, but clicking the "youtube" button will take you to the video. I found this video VERY applicable to my project and extremely interesting as well. Please watch it if you have the time, its very good! It is works cited 9.
Also please note that I may add further research above, so the summary will include anything I post from now until the due date (Nov. 1st) above. As well, the video above is just another research tool I've discovered for this project. Not sure if you can actually view it on the blog, but clicking the "youtube" button will take you to the video. I found this video VERY applicable to my project and extremely interesting as well. Please watch it if you have the time, its very good! It is works cited 9.
Oct. 22, 2012 INTERVIEW 2 (works cited #8)
Although it was great to get such detailed answers from Jackie, I got some straight to the point answer from our photographer friend Carrie Marshall. Here are her answers to my questions!
What type of photography do you like the best and why?
I like shooting people, candidly. It's the most satisfying because you capture real emotion.
In your opinion, how does portraiture (your main “type" of photography) differ in a technical sense from my "type" of photography, landscape?
As I mentioned above, I'm trying to capture emotion. Even if a client is sitting in my studio for a headshot, we have to connect on a personal level so the photograph reflects something about them. When I meet them, I don't know what to expect. In landscape, you probably have an idea of what you're looking to photograph and you set up the scene - time of day, etc to capture what you want.
How do you think different ways of editing affect the feel of a photograph? (eg B&W, sepia, colour…)
Shooting digital gives you so many options to play with different effects. It's very exciting. Some people think it's less creative, but I think it adds a whole new dimension of creativity, allbeit on the computer manipulating the image. It can become a 'cocktail' of your very own recipe! Each image can be adjusted, depending on what you're looking for.
Do you like shooting outside or indoors better?
I definitely prefer shooting outdoors!
Within each municipality I’m photographing, I’m going to have four or five “sites”, or locations. I’m trying to make each site as different as possible, and have five or six pictures from each one in the final book. Do you think this layout is good for this type of photo book/what would you change if you were the one doing this project?
I think this is a great idea! You are your own publisher, so I think you can do whatever you think best. At this point, there is no right and wrong...you are creating something!
Do you have any photography tricks that could help me in my project?
Don't be afraid to shoot something many ways. Lots of different angles, direction of light...shoot from up high and down low. Walk away from the scene and come back to it...sometimes you'll see new inspiration. Also, if you can look at your images on the big screen. You may want to make some minor adjustments -so go back and shoot it again.
Also, shoot really early in the morning OR if the light is there, later in the day. Avoid the middle of the day, unless you're looking for a harsh light.
What advice would you give an aspiring photography like me?
Carry your camera everywhere. Have it out, easy to access. Shoot, shoot, shoot! And don't hesitate to come by or call me if you have any questions! If you love it, stick with it...it will love you back.
Thanks for answering! I’ll be sure to credit you in my project.
My pleasure! I'd love to see the finished product
sometime!
Oct. 19, 2012 (works cited #7)
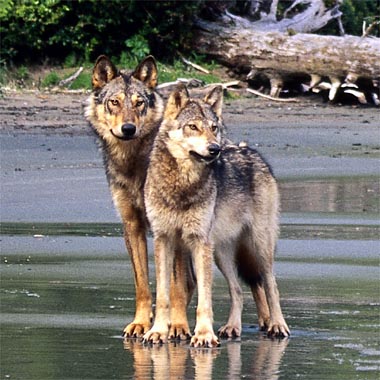
Here is a picture I've downloaded of Jacqueline Windh's work in photography. I can really tell from it that she loves photography, as she must have waited a long time for this shot to be perfect. To find out more about her, go visit her website at http://windhphotos.wordpress.com/
Oct. 19, 2012 INTERVIEW 1 PART 2 (works cited #6)
Here is the second half of my interview with Jacqueline Windh!
You made the switch from film photography to digital photography, the type I’m using for this project. Do you think that using film adds anything to a picture that digital cannot?
I don't think using film adds anything to the photo itself. Meaning that, if a person is looking at a photo and does not know whether it was originally shot on film or as digital, I don't think there is anything different in the actual photo. But one thing that interests me about slides (which is what I learned to photograph on, but which I don't shoot any more), is that the slide that you get IS the actual piece of film that was in your camera when you took the shot. That slide was THERE, with you. It is a real physical thing, that was there in the situation. There is nothing comparable to that in digital. The memory card is not the same, it just holds the files - and the files themselves are not any real thing, they are just a bunch of magnetic signals that get copied from place to place.
Not only is the slide a physical object that is there, it is the complete record of my camera settings. Shooting slides, you have to get it right when you take the photo. It's not like digital, where you can look at the photo right away and say "Oh, it's a bit dark, let me change the exposure and take it again" or "Oh there was a branch in the way, I'll take that again." With slides, you had to learn to get it right - with no feedback on the spot, waiting days or weeks to get your feedback of whether you set things right or not - and hopefully remembering what you actually did all those weeks ago when you took the photo, so you can learn from it for next time.
I do feel sad that everything has gone digital. I think it has really decreased the quality of photos out there. Partly because people who know almost nothing about photography can eventually take some great photos just because they can take thousands of photos for free - which I couldn't do when I was learning. And also because they can take OK photos and then manipulate them so easily on their computers later, to make the photos much better. But still, an OK photo (or even a pretty good photo) can never be manipulated to make it as good as a photo that was taken properly in the first place. So there are lots of pretty good photos out there these days, but way less truly excellent photos.
Do you have any photography tricks that could help me in my project?
Yes! Learn about exposure.
Cameras these days can do pretty much everything for you. They focus for you, they have simple settings for you to manipulate for close-up or action or snow. They can do almost everything you want. But they cannot figure out exposure, because that required human judgement. You need to think about what your subject is, how the light is, and what you are trying to show. The camera can't think about that.
Some people think that exposure is the same as shutter speed. But shutter speed is just one part of exposure. Exposure is how much light gets in. Part of that is because of how long the shutter is open for, which is shutter speed - so if you photograph at 1/60 of a second, twice as much light gets in compared to 1/125 of a second. The other part is how big the hole in your lens is, which is the aperture (also called F-stop). So you can set your lens on an aperture of F22, which is a very tiny hole (so very little light gets in, so it is hard to use in dim conditions) or on F8 which is about average or on F 2.8 which is a big hole, so lots of light gets in. Or anywhere between.
But some people think that if they change the shutter speed (or the exposure), they are changing the exposure. But on most camera settings (other than fully manual), if you change one, the camera will automatically change the other - so the exposure actually remains the same. You set the exposure up one stop, and the camera will set the exposure down one stop, etc. etc. Changing the exposure means that you actually over-ride that, and choose to let more or less light in. On fully manual, you leave one of them where it was and you change the other one.
The reason that you want to do that is because the camera "thinks" in terms of an average grey scene. And for your average picture, that works. Your average scene probably has some light areas and some dark areas, so for most photos your camera will probably do a good job at that.
But imagine you want to take a picture of a polar bear in the snow. The whole scene averages out to white, not grey. But your camera doesn't know that, it tries to make everything grey. So the picture will come out too dark. You have to manually tell the camera to let more light in than what average grey would be. Same goes for photographing a black bear on a black rock. Your camera will try to make everything grey, so your bear will come out grey rather than black.
What advice would you give to an aspiring photographer like me?
I would go to what I just wrote above - and learn about exposure. Your camera probably has an exposure over-ride (many digital cameras have it in 1/3 stops - you don't have to actually adjust the shutter speed or aperture - just from whatever setting you are on you can select an exposure over-ride, usually in 1/3 stop increments, e.g. +1/3, +2/3, +1, +1 1/3, etc., to make the photo lighter, and -1/3, -2/3, etc. to make it darker.
I would suggest that you try that out. Do lots of experimentation, and remember what you did. The results matter - you get a way better quality photo if you get the settings right, right from the start, compared to if you try to fix up a poor photo later on. (Because you lose information if the photo was not exposed properly to begin with - and you cannot add that information later).
If you don't have that exposure over-ride, you can trick your camera to do it anyway! This is because the camera automatically exposes the scene at the same time as it auto-focusses. This is hard to explain - but try this and you will see what I mean. Pick some landscape scene that has bright areas (usually the sky) and dark areas (usually foreground). Aim to frame the scene, and click the button. Now, staying in the same area, autofocus on other areas - press the button halfway while aiming at the bright area, then aim the camera back to the original scene and click the picture. Then do the same, aiming and autofocussing on the dark area before clicking on your scene. This is hard to explain - but you will see what I mean. Aiming at the bright area, the camera will darken the scene because it thinks it is too bright - the WHOLE photo then is taken darker. Aiming at the dark area, the camera thinks it is too dark and it lightens the WHOLE scene. It takes a bit of trial and error to figure out doing it this way - but if you try it, you will see that you can get a way better quality picture. All by tricking your camera, without even fiddling with any buttons or dials!
OK, Lauren, I hope this all helps. Good luck with it all. I would love to see your project when it is done.
Oct. 18, 2012 INTERVIEW 1 PART 1 (works cited #6)
I got am AMAZING response from my friend Jacqueline Windh on my interview questions, so I'll be posting them in two parts! THANK YOU JACKIE!
Thanks for answering my questions, Jackie! What inspired you to go into photography?
Hmm... it's hard to remember, because I was really young. I think I was 11 when I got my first camera, as a Christmas present. It was the kind that your generation has never seen! It was like a plastic box, and I had to save up to buy film for it and to be able to pay for the processing. The pictures were square. It had no focus or zoom or anything - every picture was taken the same, on its standard setting. You had to buy flash cubes separately, too - a cube with four single-use bulbs. The cube rotated when you wound the film along, so a fresh bulb came forward. The bulb exploded and melted after you took the
picture. If you accidentally had a used side of the bulb facing forward when you clicked your picture, it wouldn't fire and you wasted your frame (but would still have to pay for the black picture that got processed after!).
So I guess it was the fact that I received that camera as a present that got me started. And also that my dad had been interested in photography when he was young - he worked for a photographer when he was a teenager. So he encouraged me, too. When he saw that I was interested in photography, and trying really hard with that basic camera I had, he went out and got me an 35 mm SLR (I was in my mid-teens by then), and he especially selected one that had entirely manual settings, so that I would be forced to learn about exposure, aperture, shutter speed, focus, all that...
And, as I learned that, I think what really started to attract me about photography is that it required both the artistic and the technical sides of my brain. Lots of people are either artistic OR technical, but I have always had both sides of me really active. Photography is an art - it is painting with light (photo = light, graphy = painting or drawing). But it is also technical -
there are lots of technical things you need to learn and understand in order to do it well.
What made you want to take pictures of nature?
Two things:
Our cottage, in Muskoka (northern Ontario, about 2 hr drive north of Toronto), and National Geographic Magazine.
Our cottage was on a lake, with no road access. We had to drive to where our boat was, then boat across the lake to the cottage. My dad was an airline pilot, so he would be away for days or a week at a time, and we would be there on our own (my mom, my two sisters, and me) - with no way of getting anywhere. So I started wandering around in the woods, pretty much all day every day, being a little nature girl, turning over rocks to look for lizards, spying on turtles, learning about the different plants and animals, observing the birds, occasionally seeing other animals too. Starting to photograph those things was a natural progression.
And, of course, National Geographic magazine. I think it was that first summer that I had that little plastic camera, that I remember stalking around the woods, trying to take photos like I had seen in the magazine. I remember once when I surprised a heron in the swamp - I was on some rocks up a small cliff, above, and took a picture as it flew away. This was not the digital
age - I had to wait weeks, until I had used up the roll of film, and saved up the money to develop it, and send it in and wait a week to get the pictures back. All that time, I was imagining my amazing National Geographic-style photo... (I think the heron was growing in my imagination). When I finally got the pictures back, I flipped through to find it... and my photo was just of this
tiny little bluish grey blur in front of some bushes. I was definitely happy when I finally got that 35 mm camera, and my first telephoto lens...
Do you like shooting on sunny or cloudy days the best?
Now that is a hard question. I don't like one or the other better - they are just both different.
I definitely like being out in the sun more - so I like doing photography in the sun the best. Sometimes it is a bit restrictive, though - you can only do certain things in certain directions. Of course, the easy way to photograph is with the light behind you. I guess I like sunny days for scenery, especially in the mountains. (Grey days are terrible for mountain photography - everything looks washed out). I like sunny days when it is very late in the day and the light is low. Then you can do some interesting things! Shooting sideways to the light can be lovely when the light is low. And sometimes shooting into the light can be interesting -effects where things are back-lit.
Mixed cloud and sun can be hard. But overcast days are good for certain types of photography too. I love it when it is a very light overcast (thin cloud, and white sky - as opposed to thick cloud and grey sky). Although your eye doesn't notice the different much (because it exposes to the light automatically) the camera does. When the overcast is thin, there is still enough light coming through that you get shadows - one side of an object will be brighter than the other, shadows are still there, textures are still highlighted. If the overcast is too thick you lose all of that. So a thin-overcast day can be lovely for doing portraits of people, and also close-ups of flowers - because on a sunny day the shadows would be too harsh for those to work well in photos.
In my project, I decided not to take pictures of people so I wouldn’t have to ask for their permission. I know that you did a whole project of going into the Downtown East Side of Vancouver and asking former Residential School students to share their story and take their picture. How do you think taking pictures of people (vs. environments) affects the story of a photograph?
OK, this is one thing that I think really differentiates my photography from that of a lot of other photographers. Because photos of people do not really interest me that much - to me, what is really important is the subject in their environment. The exact same thing goes for my photos of wildlife or of flowers. I am not that interested in a tight shot that just focusses on a person's face, or a close-up of a wolf's head or of a flower. I am interested in how that subject relates to its environment, how it sits in its environment. If you look at the portraits in that residential school book, you will see that - every shot shows that person in their environment. I think that tells a HUGE amount more about the person than a close-up of their face would. It tells where the person lives, it tells how they live. It may show what they value (e.g. a guy with his cat) or what their obstacles in life are (poverty). I think showing my subjects' environment makes the picture worth WAY more than a thousand words... and same goes for my animal and flower shots, I show my subjects' environment, which says something about them.
Oct. 14, 2012 (works cited #5)
New Brighton Park History
- location of the Hastings Townsite (1865)
- citys first post office, dock, stable, playing field, customs office and museum
- location of the Hastings Townsite (1865)
- citys first post office, dock, stable, playing field, customs office and museum
Oct. 14, 2012 (works cited #4)
Vancouver Sulphur Piles History
- one of two terminals in Vancouver- Pacific Coast Terminal (PCT) and Vancouver Wharves
- PCT owned by Sultran
- Vancouver Wharves owned by BC Rail
- Vancouver is the "Canadian Sulfur gateway to the world"
- one of two terminals in Vancouver- Pacific Coast Terminal (PCT) and Vancouver Wharves
- PCT owned by Sultran
- Vancouver Wharves owned by BC Rail
- Vancouver is the "Canadian Sulfur gateway to the world"
Oct. 14, 2012 (works cited #3)
Steveston Village History
- 1878, Manoah and Martha Steves and their six children were the first family to permanently settle what used to be known as Lulu Island
- Manoah's son William developed a townsite known as "Steves", wanted to create a seaport to Vancouver
- British Army Engineers layed site, and by 1890 Steves was known as Steveston
- opera house, church, hotels, retail stores, wharf and a newspaper and hospital
- farming community, turned into a fishing community
- first cannery opened in 1882
- by 1890 Steveston was a boom town, 15 canneries and record catches of salmon, herring...
- record of 16 million pounds of shipped fish in 1901
- by 1912 the fish processing lines became automated, reducing town's pop. by nearly half
- survived the 1900 fish strike and 1918 fire
- when Japanese attacked Pearl Harbour in 1941 and Canada declared war on Japan, federal gov. arrested Japanese-Canadian males over the age of 18 and later women and children as well
- 2,600 Japanese-Canadians in Steveston were moved by train to BC's interior until 1949 (the end of hostilities)
- home to 2 National Historic Sites of Canada- Gulf of Georgia Cannery and Britannia Heritage Shipyard Park
Oct. 14, 2012 (works cited #2)
Vancouver School of Conceptual Photography (photoconceptualism)
- What is it?
- grouping of artists from Vancouver starting in 1980s
- not an actual 'school', rather an idea or style
- mix of older conceptual art practices and mass media
- "photographs of high intensity and complex content that probed, obliquely or directly, the social force of imagery"
- artists involved: Vikky Alexander, Roy Arden, Ken Lum, Jeff Wall, Ian Wallace, Stan Douglas and Rodney Graham
- History
- "rebranding" of Vancouver, started in the early 1980s
- desire for larger recognition within Canada and internationally
- to present Vancouver art to the larger international market
Oct. 9, 2012 (works cited #1)
Shooting Outdoors
- Midday (full sun and shade)
- crisp and bright colours but sun can overexpose
- food shot at this time of day may have a yellow cast
- if subject is being positioned in the shade, make sure there is enough illumination
- Sunrise/Sunset
- ideal time for shooting outside
- light is soft and rich, great on skin tones
- can shoot into the light without overexposing shots
- "the golden hour"
- great time to shoot food- warm atmosphere
- sun flare is great at this time (good for nostalgic shots/dreamy shots)
- Cloud cover
- clouds act as a diffuser around the sun (no harsh shadows or hot spots)
- portraiture- get a reflector to bounce light back at the subject
- landscapes, people, food and street scenes look good in this light
- might have subtle blue tones
Shooting Indoors
- Natural light
- most flattering light when shooting indoors
- consistent/even light coverage (rather than outdoors)
- filter sunlight (sheer curtains)
- cloud cover adds tints of blues and greys
- make sure to have enough light
- reflector*
- may need a tripod to stop shaky cam
- Artificial light
- may have a yellow cast
- possibly uneven illumination (fix a light source if you can)
Oct. 7, 2012 (works cited #1)
Composition cont.
- Framing
- add frames within frames (eg branches, buildings)
- Positive and Negative Space
- positive= subject of image, negative= space around it
- try negative space first before positioning subject
- negative space can become the subject itself
- Movement- the actual physical movement of the captured subject or the movement of the viewer's eye as it travels through the composition
- curves, geometric shapes, flowing lines that take the eye in a certain direction
- Balance and Unity
- try adding secondary objects to create balance
- balance of light and dark, lines and shapes, movement and stillness
- Lines and Shapes
- curved lines= friendly and natural, sharp lines= danger and discomfort
- Patterns
- give pics a sense of sturcture and movement
- can be subtle or obvious
- look for man made and natural patters
- Symmetry and Asymmetry
- symmetry in buildings and archetecture
- mirrored lines and shapes create symmetry (look in water)
- Colour and Abstraction
- complementary colours look good
- similar colours create harmony
- Lighting
- two hours before sunset and two hours after sunrise are the perfect times to shoot lighting wise
- midday light can be harsh (right angles needed)
- mirrors and glass add nice lighting (light bounced off of them into the lens)
- Subject Choice and Storytelling
- take pictures of things that interest you
- experiment with everything- subject, area, time of day- to find your style
- look at other photographer's work to inspire your style
- Props
- when using props, *REMEMBER THE RULES* (rule of thirds, rule of odds...)
- some materials absorb light and others reflect (keep in mind to avoid overexposure)
- Portraiture
- patience is important as the subject is alive and might move
- catch a candid moment
- find the right position (model seated while you stand adds a tilt that makes the eyes look bigger and tightens the skin on their neck)
- get closer (fill the frame)
- smile naturally and not forced (make the model laugh)
Oct. 4, 2012 (works cited #1)
Composition
- IMPORTANT: shape, colour, expression
- Rule of photography: compose before taking the picture
- The Rule of Thirds: two horizontal lines and two vertical lines that create nine equal sections
-especially used when shooting landscapes
-horizon line on horizonal upper or lower line to create more impact
-primary subject: put in the right third of the grid
-a person: put in centre of frame (eyes lined up with upper horizontal line)
- Breaking the Rule of Thirds
- explore angles/cropping
- The Rule of Odds
- odd numbers are more pleasing to the eye
- threes rather than twos, fives rather than fours
- one subject= patterns of threes or fives in the background
- Breaking the Rule of Odds
- embrace symmetry and balance
- DOF (Depth of Field)- portion of the scene that is in focus
- landscapes= large DOF (takes in everything)
- portraiture= shallow DOF (focus in the foreground)
- things that affect DOF: focal length of lens, Aperture setting (f-number)
- Perspective- focal length of a lens and they way a scene can be manipulated to get more depth
- light foreground and dark background adds sense of depth to a shot
- angles/viewpoints- could affect the feel of the shot (closeness)
- using a wide range in photography makes for a more interesting collection of pictures
- take risks!
